
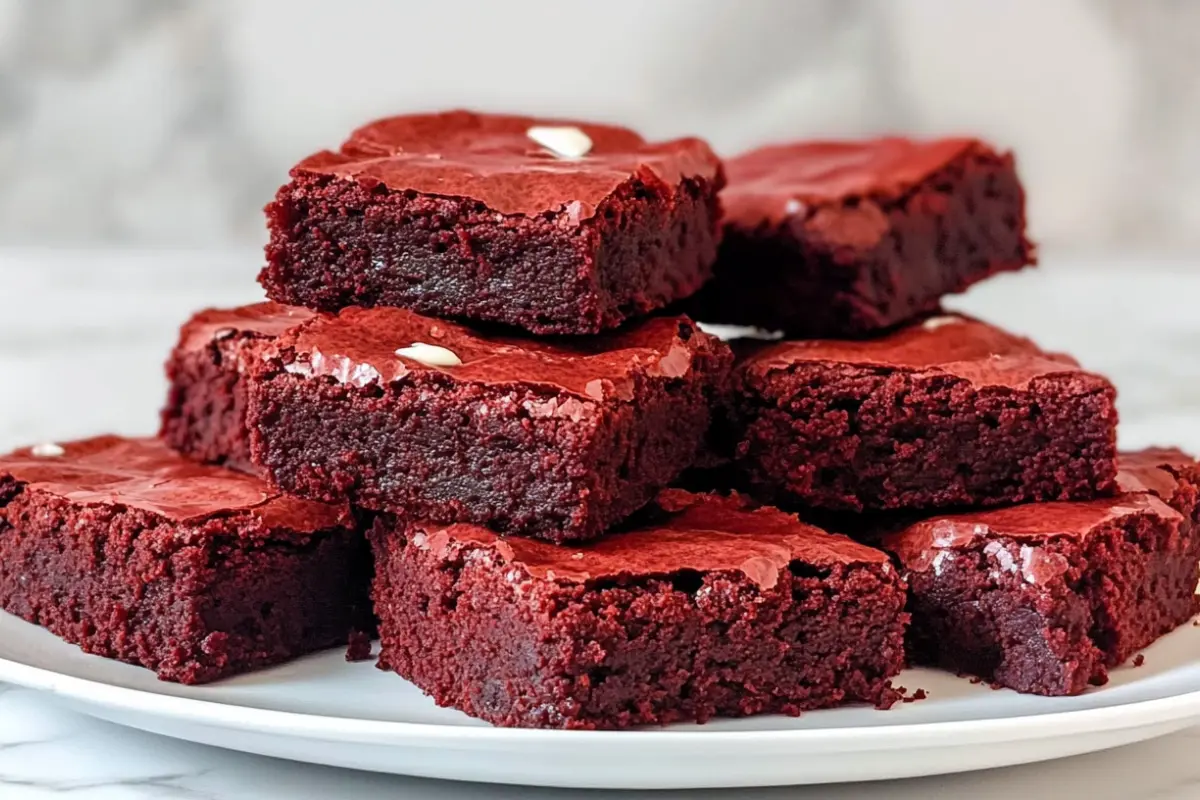
When it comes to show-stopping desserts, few treats are as visually stunning and delicious as Red Velvet Brownies. These brownies combine the best of two worlds: the rich, chocolatey flavor of classic brownies and the signature tangy sweetness of red velvet cake. The result is a fudgy, chewy brownie that’s not only eye-catching with its vibrant red color but also bursting with flavor. Whether you’re a seasoned baker or just starting out, Red Velvet Brownies are the perfect dessert to impress your family, friends, or even just yourself.
In this comprehensive guide, you’ll learn everything you need to know about making the perfect Red Velvet Brownies, from selecting the right ingredients to mastering advanced tips and storage techniques. Plus, we’ll explore how to make these brownies fit a range of dietary preferences, so no one has to miss out on this decadent treat.
Introduction to Red Velvet Brownies
If you’re looking for a dessert that’s not only delicious but also visually striking, Red Velvet Brownies should be at the top of your list. These brownies are the perfect combination of rich cocoa flavor, a soft and chewy texture, and the distinctive tang that comes from the vinegar or buttermilk typically used in red velvet recipes. Topped with a swirl of cream cheese or a simple cream cheese frosting, they offer a multi-layered taste experience that makes them stand out from ordinary brownies.
What makes Red Velvet Brownies so appealing is their simplicity. With just a few pantry staples like flour, sugar, eggs, and cocoa powder, you can whip up a batch in no time. And while their appearance might suggest a complicated recipe, these brownies are surprisingly easy to make, even for beginners. The deep red color, typically achieved with food coloring, adds an extra element of fun, making them perfect for festive occasions like Valentine’s Day, Christmas, or birthdays.
But these brownies aren’t just for special occasions. They’re also an excellent option for a quick weeknight dessert, a lunchbox treat, or even a holiday gift. And if you have dietary restrictions or preferences, fear not—this recipe can be easily adapted to fit gluten-free, vegan, or low-sugar diets without sacrificing any of the flavor or texture that makes Red Velvet Brownies so irresistible.
Benefits and Advantages of Red Velvet Brownies
Why should you choose Red Velvet Brownies over other dessert options? Here are several reasons why these brownies stand out:
1. Simple and Quick to Make
For home cooks and busy individuals, the biggest selling point of Red Velvet Brownies is how easy they are to make. The recipe requires basic baking techniques like mixing dry and wet ingredients separately, folding them together, and popping them into the oven. You don’t need any fancy equipment—just a bowl, a whisk, and a baking pan. In less than an hour, you can have a batch of delicious, homemade brownies cooling on your countertop.
Even though they look impressive, the steps involved in making Red Velvet Brownies are simple enough that even novice bakers can pull them off without stress. This makes them an ideal choice for students, working professionals, or anyone who wants to whip up a quick yet impressive dessert.
2. Versatile for Different Occasions
Whether you’re hosting a party, attending a potluck, or simply craving a sweet treat after dinner, Red Velvet Brownies fit every occasion. Their vibrant color makes them a fun choice for holidays and celebrations, while their rich taste ensures they’re always a crowd-pleaser. They can be dressed up with cream cheese frosting or served plain, depending on the occasion.
For Valentine’s Day, a heart-shaped cookie cutter can turn these brownies into adorable treats. Additionally, for Christmas, a sprinkle of powdered sugar or a drizzle of white chocolate can give them a festive flair. Whatever the occasion, Red Velvet Brownies can be easily tailored to fit the theme.
3. Healthier Than Traditional Brownies
While Red Velvet Brownies are still a dessert and should be enjoyed in moderation, they can be made healthier with a few simple ingredient swaps. You can reduce the sugar content by using a sugar substitute like stevia or monk fruit, and you can make them lower in fat by substituting some of the butter with applesauce or Greek yogurt. Additionally, the use of cocoa powder in place of melted chocolate helps keep the calorie count lower compared to traditional chocolate brownies.
If you’re looking to boost the nutritional content of your brownies, you can also add ingredients like whole wheat flour or flaxseeds for extra fiber. And because these brownies can be made gluten-free or vegan, they’re accessible to those with dietary restrictions who might otherwise miss out on a decadent treat.
4. Rich, Complex Flavor
The signature red velvet flavor is a delicate balance of sweetness and tanginess, which comes from a combination of cocoa powder, vinegar, or buttermilk. The addition of vanilla extract further enhances the flavor profile, creating a dessert that’s not too sweet but still deeply satisfying. Unlike traditional brownies, which are primarily chocolate-forward, Red Velvet Brownies have a more complex taste that’s equal parts rich and refreshing.
When paired with a cream cheese frosting or swirl, Red Velvet Brownies reach another level of indulgence. The tangy cream cheese complements the sweetness of the brownie, making every bite a delightful contrast of flavors.
5. Adaptable for Dietary Preferences
One of the best things about Red Velvet Brownies is their adaptability. Moreover, with a few simple swaps, you can make them fit a range of dietary preferences:
- Gluten-Free: Use a gluten-free all-purpose flour blend in place of regular flour.
- Vegan: Replace eggs with flaxseed eggs, and swap out the butter and cream cheese for plant-based alternatives.
- Low-Sugar: Reduce the sugar content by half, or use a sugar substitute like erythritol or stevia.
- Dairy-Free: Use coconut oil or vegan margarine in place of butter, and choose dairy-free cream cheese for the frosting or swirl.
No matter what your dietary needs are, Red Velvet Brownies can be easily customized to suit them without losing their delicious flavor or fudgy texture.
Ingredients Overview
To ensure you get the perfect batch of Red Velvet Brownies every time, it’s important to understand the role of each ingredient. Below is a detailed breakdown of the essential ingredients and, furthermore, their function in the recipe.
Essential Ingredients for Red Velvet Brownies
- All-purpose flour (1 cup): Flour provides the structure for the brownies. You can use a gluten-free flour blend if necessary, but make sure it includes xanthan gum to mimic the gluten’s role in holding the brownies together.
- Cocoa powder (2 tablespoons): Cocoa powder gives the brownies their chocolatey base without overpowering the red velvet flavor. For optimal results, ensure you use unsweetened cocoa powder.
- Granulated sugar (1 cup): Sugar adds sweetness and helps create a chewy texture. You can substitute half of the sugar with a low-calorie sweetener for a healthier option.
- Butter (½ cup, melted): Butter adds moisture and richness to the brownies. For a dairy-free version, use coconut oil or a plant-based butter substitute.
- Eggs (2 large): Eggs provide structure and help bind the ingredients together. For a vegan version, replace the eggs with flaxseed eggs (1 tablespoon of ground flaxseed mixed with 3 tablespoons of water per egg).
- Vanilla extract (1 teaspoon): Vanilla enhances the flavor of the cocoa and adds depth to the brownies.
- White vinegar (1 teaspoon): The vinegar reacts with the cocoa powder to give the brownies their slight tanginess and red velvet flavor. You can also use buttermilk if you prefer a more traditional red velvet taste.
- Red food coloring (1 tablespoon): The food coloring gives the brownies their signature red hue. You can use a natural alternative, such as beet juice or pomegranate juice, if you prefer to avoid artificial dyes.
- Cream cheese (for frosting or swirl, optional): Cream cheese adds a rich, tangy flavor that pairs perfectly with the sweetness of the brownies. You can use dairy-free cream cheese if needed.
Dietary Substitutions to Customize Your Red Velvet Brownies
Red Velvet Brownies are incredibly versatile and can be customized to fit a variety of dietary needs. Here are some easy substitutions:
<.-- wp:heading {"level":4} -->
1. Gluten-Free Substitutions
To make your Red Velvet Brownies gluten-free, simply swap out the all-purpose flour with a gluten-free flour blend. Many gluten-free blends are available that mimic the properties of wheat flour, so your brownies will still have the same texture and taste. Make sure the blend contains xanthan gum or add it separately (about ¼ teaspoon) to give the brownies structure.
<.-- wp:heading {"level":4} -->
2. Vegan Substitutions
For a vegan version of Red Velvet Brownies, replace the butter with a plant-based alternative like coconut oil or vegan margarine. Use flaxseed eggs in place of regular eggs: mix 1 tablespoon of ground flaxseeds with 3 tablespoons of water per egg. Allow the mixture to rest for a little while until it thickens. For the cream cheese swirl or frosting, use a vegan cream cheese alternative.
<.-- wp:heading {"level":4} -->
3. Dairy-Free Substitutions
To make these brownies dairy-free, use coconut oil or a dairy-free butter substitute in place of regular butter. You can also find dairy-free cream cheese for the swirl or frosting. Coconut oil works especially well, adding a slight coconut flavor that complements the red velvet taste.
<.-- wp:heading {"level":4} -->
4. Lower-Sugar Substitutions
For a lower-sugar version, you can substitute half the sugar with a low-calorie sweetener like stevia, monk fruit, or erythritol. Keep in mind that sugar helps contribute to the texture of the brownies, so if you reduce it too much, you might need to experiment with adjusting the other wet ingredients to maintain the fudgy consistency.
How to Prepare the Perfect Red Velvet Brownies: Step-by-Step Guide
Ready to bake your own batch of Red Velvet Brownies? To get infallible outcomes consistently, adhere to this meticulous and systematic strategy.
First Step: Preheat the Oven and Prepare the Baking Pan
Start by preheating your oven to 350°F (175°C). While the oven heats up, grease an 8×8-inch baking pan with butter or non-stick spray, and then line it with parchment paper. The parchment paper makes it easier to lift the brownies out of the pan once they’re baked, ensuring clean, perfect slices.
Second Step: Mix the Dry Ingredients
In a medium-sized bowl, whisk together 1 cup of all-purpose flour, 2 tablespoons of unsweetened cocoa powder, and a pinch of salt. Be sure to sift these ingredients to remove any lumps and to ensure a smooth batter. The cocoa powder adds the chocolate flavor, but because this is a red velvet recipe, we don’t want it to be too overpowering.
Third Step: Prepare the Wet Ingredients
In a separate, larger bowl, combine ½ cup of melted butter and 1 cup of granulated sugar. Beat the mixture together until it becomes smooth and creamy. You can use a hand mixer or whisk for this step. Next, add 2 large eggs one at a time, making sure to mix well after each addition. Once the eggs are fully incorporated, stir in 1 teaspoon of vanilla extract and 1 tablespoon of red food coloring.
Fourth Step: Combine the Wet and Dry Ingredients
Slowly add the dry ingredients into the wet mixture, folding everything together gently with a spatula. Be careful not to overmix the batter, as this can result in dense, tough brownies. Once the dry ingredients are just incorporated, stir in 1 teaspoon of white vinegar. The vinegar helps to activate the baking soda in the cocoa powder, giving the brownies their characteristic red velvet tang and soft texture.
Fifth Step: Add the Cream Cheese Swirl (Optional)
If you’re making cream cheese swirl brownies, this is the time to add it. In a small bowl, beat together 4 ounces of softened cream cheese, ¼ cup of sugar, 1 egg yolk, and ½ teaspoon of vanilla extract until smooth. Drop spoonfuls of this mixture over the brownie batter in the pan, then use a knife to swirl the cream cheese through the batter in a marble pattern.
Sixth Step: Bake the Brownies
Pour the brownie batter into your prepared baking pan, smoothing it out with a spatula. Place the pan in the oven that has been prepared and bake for a duration of 25 to 30 minutes. To assess the level of doneness, introduce a toothpick into the middle of the brownies—it should emerge with a little amount of damp crumbs attached to it.
Seventh Step: Cool and Serve
Once baked, remove the brownies from the oven and let them cool in the pan for 15 to 20 minutes. After that, lift them out of the pan using the parchment paper and transfer them to a wire rack to cool completely. Once they’re fully cool, you can frost them with cream cheese frosting or cut them into squares and enjoy them as is.
Mastering Red Velvet Brownies: Advanced Tips and Variations
Want to take your Red Velvet Brownies to the next level? Below are several sophisticated strategies and adaptations to experiment with:
1. Add Chocolate Chips
For an extra layer of richness, stir in ½ cup of chocolate chips or white chocolate chips to the brownie batter before baking. The melted chocolate will create pockets of gooey goodness throughout the brownies.
2. Cream Cheese Frosting
If you want to make your brownies extra indulgent, top them with a generous layer of cream cheese frosting. To make the frosting, beat together 8 ounces of softened cream cheese, 4 tablespoons of butter, 2 cups of powdered sugar, and 1 teaspoon of vanilla extract until smooth and creamy. Once the brownies have cooled, spread the frosting evenly over the top and garnish with a sprinkle of cocoa powder or red sugar crystals.
3. Nut Toppings
For a crunchy texture, sprinkle chopped nuts such as pecans or walnuts on top of the brownie batter before baking. The nuts add a delightful contrast to the soft, fudgy texture of the brownies.
4. Layered Red Velvet Bars
For a fun twist, create layered red velvet bars by adding a cookie crust at the bottom of the pan. Press a graham cracker or Oreo crust into the pan before pouring in the brownie batter, then bake as usual. The combination of a crunchy base and fudgy brownies makes for a deliciously unique treat.
How to Store Red Velvet Brownies: Best Practices
If you’re not planning to eat your Red Velvet Brownies right away, proper storage is key to keeping them fresh and delicious.
Refrigeration
Once the brownies have cooled, store them in an airtight container in the refrigerator. If you’ve added a cream cheese swirl or frosting, refrigeration is especially important to prevent spoilage. The brownies may be stored in the refrigerator for a maximum of 5 days.
Just be sure to bring them to room temperature before serving, as this enhances their flavor and texture.
Freezing
Red Velvet Brownies freeze exceptionally well, making them a great option for meal prep or make-ahead desserts. To freeze, wrap each brownie individually in plastic wrap, then place them in a freezer-safe bag or container. They will keep for up to 3 months. When you’re ready to enjoy them, thaw the brownies in the refrigerator overnight or at room temperature for a few hours.
Reheating
If you prefer your brownies warm, you can easily reheat them in the microwave for about 10-15 seconds. As a result, this will give them that fresh-out-of-the-oven texture, with a soft, gooey center.
Nutritional Value of Red Velvet Brownies
While Red Velvet Brownies are certainly a treat, it’s helpful to know their nutritional breakdown. Here’s the approximate nutritional content per serving (without cream cheese frosting):
- Calories: 220-250
- Total Fat: 12g
- Saturated Fat: 7g
- Cholesterol: 60mg
- Sodium: 150mg
- Total Carbohydrates: 28g
- Sugars: 18g
- Protein: 3g
Keep in mind that these values will vary depending on the ingredients and substitutions you use. If you opt for lower-sugar or vegan versions, the calorie count may be reduced.
FAQs: Frequently Asked Questions About Red Velvet Brownies
1. To what extent may Red Velvet Brownies be prepared without the use of food coloring?
You may exclude the food coloring if you so choose. While the brownies won’t have the traditional red hue, they will still taste delicious. You can also use natural alternatives like beet juice or pomegranate juice if you want a more subtle red color.
2. What’s the key to achieving the perfect red velvet flavor?
The secret to perfect red velvet flavor is balancing cocoa powder and acidity, usually from vinegar or buttermilk. Specifically, cocoa powder adds depth, while vinegar or buttermilk provides the signature tanginess.
3. Can I use natural food coloring?
Yes, natural food colorings like beet juice or pomegranate juice can be used instead of artificial food dyes. However, keep in mind that the red hue might not be as vibrant as with traditional food coloring.
4. How do I store Red Velvet Brownies with cream cheese frosting?
If your brownies have cream cheese frosting, store them in an airtight container in the refrigerator. Consequently, they will keep for up to 5 days. For longer storage, freeze the brownies in individual portions and thaw as needed.
