Buttermilk Cake

Introduction and Key Insights

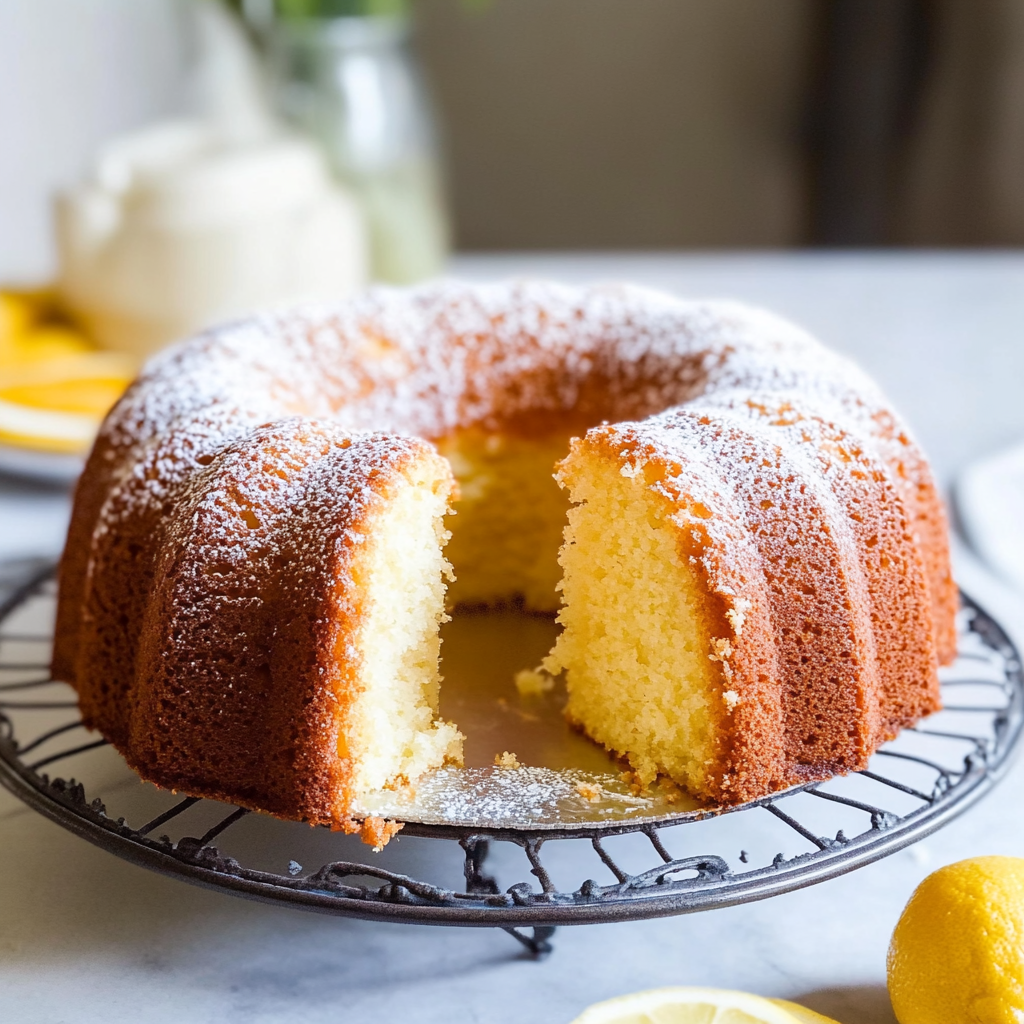
Buttermilk cake is a classic dessert that brings comfort and joy with every bite. This delightful treat boasts a moist texture and a rich flavor that makes it perfect for any occasion—be it a family gathering, birthday celebration, or simply a cozy afternoon tea. The beauty of buttermilk cake lies in its versatility; it can be enjoyed plain or dressed up with your favorite frostings or fruits.

This recipe will guide you through the process of creating your own buttermilk cake from scratch. You’ll learn about the essential ingredients needed to achieve the perfect balance of moisture and flavor. Additionally, we will explore various serving suggestions and storage tips to ensure your creation remains fresh and delicious.

Making a buttermilk cake is not just about following a recipe; it’s about embracing the joy of baking and sharing something special with loved ones. As you gather your ingredients and prepare your kitchen, envision the moments you’ll create around this scrumptious dessert. With simple steps and easy-to-follow instructions, you’ll soon discover why this delightful treat has become a staple in many homes.

Now, let’s dive into what makes this buttermilk cake so special by exploring the core ingredients that come together to create its deliciousness.

Ingredients Overview for Buttermilk Cake

All-Purpose Flour

All-purpose flour serves as the foundation of your buttermilk cake, providing structure and stability. For this recipe, you will need 2 cups of all-purpose flour. This type of flour has a moderate protein content that allows for flexibility in various baking recipes. Be sure to sift your flour before measuring to prevent clumps and ensure an even consistency throughout your batter.

Granulated Sugar

Granulated sugar sweetens your buttermilk cake while also contributing to its tender crumb. You’ll require 1 ½ cups of granulated sugar for this recipe. The sugar not only enhances the flavor but also aids in achieving that lovely golden crust on top during baking. Mixing the sugar well with butter helps create air pockets that lead to lightness in texture.

Unsalted Butter

Unsalted butter adds richness and moisture to your buttermilk cake. Use ½ cup (or one stick) of softened unsalted butter in this recipe. It’s essential to use unsalted butter so you can control the amount of salt added separately. The butter should be at room temperature when you begin mixing; this ensures it creams smoothly with sugar for an airy batter.

Buttermilk

Buttermilk provides acidity that activates baking soda, leading to a tender crumb in your cake. You’ll need 1 cup of fresh buttermilk for this recipe. If you don’t have buttermilk on hand, you can make a substitute by mixing milk with vinegar or lemon juice—simply add one tablespoon of acid per cup of milk and let it sit for five minutes before using.

Eggs

Eggs are crucial for binding all ingredients together while adding moisture and richness. For this recipe, use 3 large eggs at room temperature. They help provide structure as they coagulate during baking, ensuring your cake rises beautifully without collapsing.

Baking Powder

Baking powder is a leavening agent that helps your cake rise by creating air bubbles during baking. You will need 2 teaspoons of baking powder in this recipe. Make sure your baking powder is fresh; expired leavening agents can lead to dense cakes lacking volume.

Salt

Salt enhances flavors across all baked goods; it’s amazing how just a pinch can elevate sweetness! Use ½ teaspoon of salt in this recipe to balance out the sweetness from sugar while enhancing overall taste.

Vanilla Extract

Vanilla extract adds warmth and depth to flavors within your buttermilk cake batter. For an aromatic touch, include 2 teaspoons of pure vanilla extract in your mixture. This ingredient gives an inviting scent that fills your kitchen while baking.

How to Prepare Buttermilk Cake

Step 1: Preheat Your Oven

Begin by preheating your oven to 350°F (175°C). This step is crucial because starting with a hot oven helps create an ideal environment for rising right from the moment you place the batter inside. While waiting for the oven to heat up, prepare a round or square baking pan by greasing it lightly with butter or non-stick spray followed by dusting it with flour—this prevents sticking later on!

Step 2: Cream Butter and Sugar

In a large mixing bowl, combine the softened unsalted butter (½ cup) with granulated sugar (1 ½ cups). Using an electric mixer on medium speed, cream these two ingredients together until they turn light and fluffy—approximately 3-5 minutes is ideal here! This process incorporates air into the mixture which helps achieve that light texture we desire in our final product.

Once creamed properly, add eggs (3 large) one at a time while continuing to mix between each addition until fully incorporated into the batter along with 2 teaspoons of pure vanilla extract—this will enhance both flavor profiles!

Step 3: Combine Dry Ingredients

In another bowl, whisk together all-purpose flour (2 cups), baking powder (2 teaspoons), and salt (½ teaspoon). Ensure they are evenly distributed so each bite contains balanced flavors! Once mixed well enough visually—that means no visible lumps remain—gradually add this dry blend into wet ingredients we previously prepared while alternating with adding our key liquid component: fresh buttermilk (1 cup).

Start by adding one-third of dry mix then half our total measured amount of liquid before repeating these steps until everything combines perfectly into smooth batter consistency—a light folding motion works wonders here!

Step 4: Pour Batter Into Pan

Once everything blends harmoniously without over-mixing—this could lead us down a dense path! Pour prepared batter gently into previously greased-and-floured pan(s). Make sure it’s levelled evenly across surface using spatula if necessary! This ensures even cooking throughout as there would be no risk areas where dryness occurs due uneven distribution within vessel itself!

Tap gently against countertop once or twice; doing so releases trapped air bubbles allowing better rise during bake-time too! Now place carefully onto center rack within preheated oven allowing magic happen over next thirty-five-forty minutes depending upon size chosen!

Step 5: Check For Doneness

To check if our lovely creation has finished baking successfully: insert toothpick straight through middle—it should come out clean without any sticky remnants attached—if not yet done leave additional five-minute intervals checking periodically until desired outcome achieved! Once ready remove from oven allowing cool down naturally within pan set atop wire rack roughly ten-fifteen minutes before transferring out completely onward cooling down entirely upon surface below!

Serving and storing

Serving and Storing Tips

Serving Suggestions

A freshly baked buttermilk cake is delightful on its own or dressed up with toppings! Consider serving slices plain alongside whipped cream or vanilla ice cream topped off fresh berries like strawberries or blueberries—this adds color contrast elevating presentation beautifully! Alternatively try drizzling some chocolate ganache over each slice creating decadence perfect enough even special occasions warrant celebration!

You might also consider pairing slices alongside brewed coffee or herbal teas making them ideal afternoon snacks too! If hosting gatherings don’t hesitate showcasing artistic flair either presenting layered versions filled between layers frosting choices such as cream cheese frosting making visually stunning masterpieces fit right upon dessert tables everywhere!

Lastly remember portion sizes—it’s always tempting indulging too much especially when enjoying something truly scrumptious like homemade goodies however balance remains key here ensuring everyone gets chance sampling delights available without overdoing it themselves either way around table setting!

Storage Guidelines

To maintain the freshness of your baked goods, it’s essential to allow the item to cool completely before storing it. Once cooled, wrap leftover pieces tightly in plastic wrap to protect them from exposure to air, which can cause the bread to dry out. This simple step helps preserve the moisture and quality of the dish, ensuring that every subsequent serving tastes just as fresh as the first one. Storing at room temperature, away from direct sunlight, can keep your baked goods at their best for up to two or three days.

For extended storage, consider refrigerating the entire uncut loaf, securely wrapped to save space and prolong its shelf life. This method can help maintain the bread’s freshness for four to five days, offering the convenience of enjoying a quick, delightful treat whenever desired. This approach not only allows for efficient space use but also helps in planning ahead, ensuring you have tasty options available when busy days ahead arise.

In the long run, by implementing these simple storage practices, you can enjoy your culinary creations across days, while fostering the kind of experiences that bring people together—sharing moments of joy, laughter, and good food. The memories made around the table with loved ones, enjoying food that connects generations, will always be cherished. It’s these shared meals and the traditions around them that unify us, making them integral to the rich tapestry of human experiences that continue to shape our lives.

Mistakes to avoid

When baking a Buttermilk Cake, there are several common mistakes that can compromise the texture and flavor of your cake.

One major mistake is not using room temperature ingredients. Cold ingredients can lead to uneven mixing, resulting in a dense cake. Always ensure that your butter, eggs, and buttermilk are at room temperature before you start mixing. This allows for better emulsification, leading to a lighter cake.

Another common error is overmixing the batter. While it might seem intuitive to mix thoroughly for a smooth consistency, overmixing can develop gluten in the flour, making your cake tough instead of tender. Aim for just combining the wet and dry ingredients until no dry flour remains; small lumps are okay!

Failing to properly measure ingredients can also ruin your Buttermilk Cake. Baking is a science that requires precision. Use measuring cups and spoons instead of guessing amounts. Also, spoon flour into the measuring cup without packing it down; this ensures you use the correct amount.

Not preheating your oven is another pitfall to avoid. A preheated oven ensures even baking from the start. If you put your cake in an unheated oven, it may rise unevenly or not bake through properly.

Lastly, ignoring cooling times can affect your cake’s structure. Allowing your cake to cool in the pan for the recommended time helps it set and prevents it from crumbling when you remove it.

Tips and tricks

Tips and tricks

To perfect your Buttermilk Cake, consider these valuable tips and tricks that enhance both flavor and presentation.

First, try using high-quality buttermilk. The flavor of buttermilk varies greatly depending on its quality. Opting for fresh buttermilk will add a delightful tanginess that elevates the cake’s taste profile.

Additionally, incorporating vanilla extract or almond extract can really enhance the overall flavor of your cake. These extracts complement the tangy notes of buttermilk beautifully and create a more complex taste experience.

Pay attention to baking times as well; every oven behaves differently. Invest in an oven thermometer to ensure accurate temperatures and check for doneness a few minutes before the indicated time by inserting a toothpick into the center. If it comes out clean or with just a few moist crumbs clinging to it, your cake is ready!

For added moisture and flavor, consider adding citrus zest like lemon or orange to the batter. Its brightness contrasts wonderfully with the richness of buttermilk, making each bite refreshing.

Lastly, don’t forget about presentation. Dusting powdered sugar on top after cooling gives a professional touch while enhancing visual appeal without overwhelming sweetness.

Suggestions for Buttermilk Cake

If you want to take your Buttermilk Cake up a notch, here are some innovative suggestions that will delight your taste buds.

Consider adding layers to create a stunning multi-layered cake. Baking multiple layers allows you to incorporate various fillings such as whipped cream or fruit preserves between layers for added texture and flavor contrast.

Experimenting with different frostings can also elevate your dessert game. Cream cheese frosting pairs exceptionally well with buttermilk cakes due to its tanginess that complements the cake’s flavors beautifully.

You might also explore adding nuts like walnuts or pecans into the batter for added crunch and richness. Just chop them finely so they blend seamlessly into each slice without overpowering other flavors.

For a seasonal twist, add spices such as cinnamon or nutmeg for warm notes during colder months or fresh berries like strawberries or blueberries in summer for a fruity touch.

Finally, consider serving your Buttermilk Cake with homemade sauces such as chocolate ganache or caramel drizzle for an indulgent finish that takes this classic dessert over the top.

FAQs

FAQs

What makes Buttermilk Cake different from regular cake?

Buttermilk Cake stands out primarily due to its ingredient— buttermilk—which adds moisture and tenderness while providing a slight tanginess absent in traditional cakes made with regular milk or water. This unique ingredient interacts with baking soda or baking powder during leavening, resulting in a lighter crumb texture that’s both fluffy and flavorful compared to standard cakes.

Can I substitute buttermilk in my recipe?

Yes! If you don’t have buttermilk on hand, you can make a quick substitute by mixing one cup of milk with one tablespoon of vinegar or lemon juice; let it sit for about 5-10 minutes until it thickens slightly. Alternatively, plain yogurt can also work as an effective swap due to its similar acidity level which contributes positively towards leavening when used in baking recipes like Buttermilk Cake.

How do I store leftover Buttermilk Cake?

To keep leftover Buttermilk Cake fresh longer than typical cakes would last outside at room temperature (usually around 2 days), wrap slices tightly in plastic wrap before placing them inside an airtight container stored inside either refrigerate if desired extra freshness up until approximately one week maximum—or freeze individual slices wrapped securely up until three months later! Allow thawing overnight before enjoying again!

Can I make this recipe gluten-free?

Absolutely! You can easily convert any standard recipe into gluten-free by substituting all-purpose flour with gluten-free blends available commercially today—simply ensure those alternatives contain xanthan gum which helps mimic elasticity found naturally within wheat-based flours! Adjust liquid amounts slightly since gluten-free batters tend toward being thicker than their conventional counterparts require careful monitoring throughout preparation stages!

Why does my Buttermilk Cake sink in the middle?

A sunken middle often results from common culprits such as overmixing batter leading too much air incorporated causing instability while baking; alternatively insufficient baking time could allow collapse from undercooked center—always check doneness earlier than recipe indicates! Lastly check oven temperature accuracy regularly since improper heat distribution directly affects baking results!

Can I add fruit toppings on my Buttermilk Cake?

Of course! Adding fresh fruits like berries not only enhances visual appeal but also compliments flavors beautifully when served alongside slices at gatherings & celebrations alike! Just be sure any juices released from toppings won’t make layers soggy after assembly—consider lightly coating fruits first if needed prior decoration process begins!

Conclusion

In conclusion, mastering Buttermilk Cake involves understanding common mistakes while employing essential tips and tricks along the way. Always ensure ingredients are measured accurately at room temperature for optimal mixing results while avoiding overmixing will lead towards achieving desirable textures instead of undesirable toughness! Experimentation isn’t just encouraged—it’s necessary when creating variations tailored specifically towards personal preferences—whether layering additional frostings atop each slice garnished accordingly will undoubtedly impress anyone lucky enough receiving piece dessert!

To summarize key points: utilize high-quality components including fresh buttermilk; follow precise baking instructions keeping close eye timing; explore innovative options such as layered creations adding complementary flavors through extracts & spices—ultimately transforming humble recipes into extraordinary desserts everyone loves enjoying together around tables filled friendship laughter joyfully shared moments sweetened further deliciousness presented alongside delectable treats baked love!

Print

Buttermilk Cake

Greek Yogurt Cheesecake is a lighter, creamier version of the traditional cheesecake, incorporating tangy Greek yogurt into the filling. It delivers all the rich and indulgent flavor you love, with a bit less sweetness and a lot more depth, making it the perfect balance of creamy, tart, and delicious.


  • Author: Mason Recipes
  • Prep Time: 15 minutes
  • Cook Time: 50–60 minutes
  • Total Time: 5 hours (including cooling)
  • Yield: 8 servings 1x
  • Category: Dessert
  • Method: Baking
  • Cuisine: American
  • Diet: Vegetarian

Ingredients

Scale

For the Crust:

  • 1 1/2 cups graham cracker crumbs
  • 1/4 cup granulated sugar
  • 1/2 cup unsalted butter, melted

For the Cheesecake Filling:

  • 2 cups plain Greek yogurt (full-fat or 2%)
  • 16 oz cream cheese, softened
  • 1 cup granulated sugar
  • 3 large eggs
  • 1 teaspoon vanilla extract
  • 1 tablespoon all-purpose flour (optional, helps with stability)
  • 1 tablespoon lemon juice (optional, for added flavor)

For the Topping (Optional):

  • Fresh fruit (berries, mango, etc.)
  • Whipped cream or Greek yogurt (optional)

Instructions

  1. Preheat the Oven:
    • Preheat your oven to 325°F (165°C). Grease or line a 9-inch springform pan with parchment paper.
  2. Prepare the Crust:
    • In a medium bowl, combine the graham cracker crumbs, sugar, and melted butter. Mix until the crumbs are evenly coated.
    • Press the mixture into the bottom of the prepared pan to form a firm crust. Bake in the preheated oven for about 8–10 minutes, or until golden brown. Set aside to cool while you prepare the filling.
  3. Make the Cheesecake Filling:
    • In a large bowl, beat the cream cheese and Greek yogurt together until smooth and creamy, about 2–3 minutes.
    • Add the sugar, eggs, and vanilla extract, beating until fully combined. Scrape down the sides of the bowl to ensure everything is well mixed.
    • If using, add the flour and lemon juice, then mix again until just combined.
  4. Bake the Cheesecake:
    • Pour the cheesecake filling into the cooled crust and smooth the top with a spatula.
    • Bake at 325°F (165°C) for about 50–60 minutes, or until the center is almost set (it should have a slight wobble).
    • Turn off the oven and leave the cheesecake inside for another hour with the door ajar to cool gradually. This helps prevent cracks from forming.
  5. Cool and Chill:
    • Once cooled to room temperature, refrigerate the cheesecake for at least 4 hours, or preferably overnight. This will help the flavors meld and the texture set.
  6. Serve:
    • Before serving, top with fresh fruit, a dollop of whipped cream, or extra Greek yogurt if desired.

Notes

  • For a gluten-free version, substitute the graham cracker crust with a gluten-free alternative or crushed nuts.
  • You can add a swirl of fruit compote or caramel sauce to the filling before baking for an added flavor twist.
  • If you prefer a denser cheesecake, you can add a little more cream cheese and reduce the Greek yogurt slightly.

Keywords: Greek Yogurt Cheesecake, healthier cheesecake, Greek yogurt dessert, creamy cheesecake, easy cheesecake, no-crack cheesecake, lighter cheesecake recipe, Greek yogurt recipes, homemade cheesecake.

Did you make this recipe?

Share a photo and tag us — we can't wait to see what you've made!

Leave a Comment

Recipe rating