
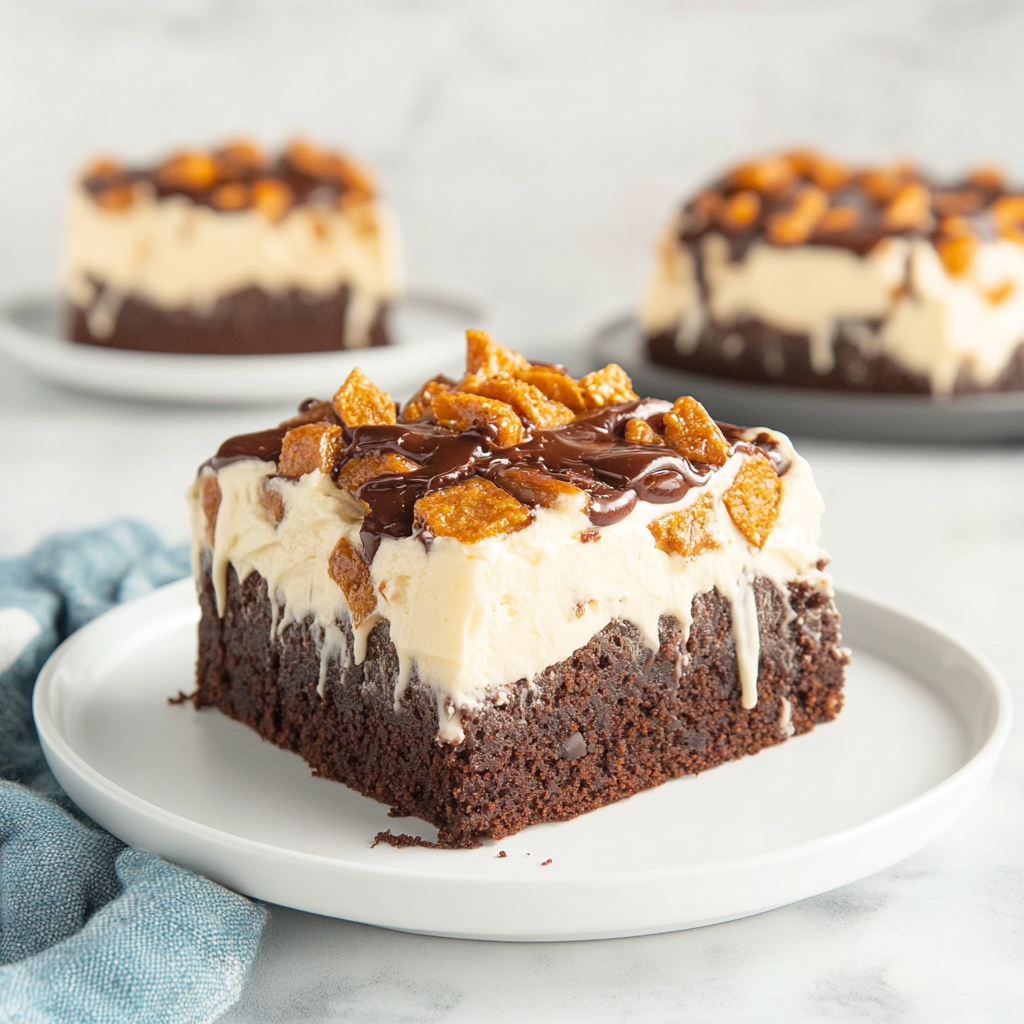
There’s something magical about a butterfinger cake; it’s like biting into a slice of nostalgia wrapped in layers of creamy goodness and crunchy, chocolatey delight. Imagine the sweet aroma wafting through your kitchen as the cake bakes, coaxing you closer with every heavenly whiff. The textures are truly tantalizing—soft, moist cake meets the delightful crunch of crushed Butterfinger bars, creating a symphony of flavor that dances on your palate.
Picture this: it’s a cozy family gathering, laughter fills the air, and everyone is eagerly awaiting dessert. As I unveil the butterfinger cake, eyes widen in excitement, and I can already hear the chorus of “Oohs” and “Aahs” as they dive in for a taste. This cake is not just a dessert; it’s an experience meant to be shared during birthdays, holidays, or any occasion that calls for something extraordinarily sweet.
Why You'll Love This Recipe
- This butterfinger cake is incredibly easy to prepare and perfect for even novice bakers
- The rich flavor profile combines chocolate and peanut butter for an irresistible treat
- Its stunning layers make it visually appealing for any celebration or gathering
- Versatile enough to serve at parties or just because you deserve a slice of happiness!
One time, I brought this butterfinger cake to a potluck dinner, and people wouldn’t stop complimenting me. Let’s just say there were no leftovers; it vanished faster than a magician’s rabbit!
Essential Ingredients
Here’s what you’ll need to make this delicious dish:
-
All-Purpose Flour: Use high-quality flour for that perfect structure in your cake.
-
Granulated Sugar: Sweetens the deal and balances out all that rich flavor.
-
Baking Powder: Essential for giving your cake that wonderful lift.
-
Salt: A pinch is vital to enhance all those sweet flavors.
-
Unsalted Butter: Softened to room temperature for easy mixing.
-
Eggs: Large eggs will bind everything together beautifully.
-
Vanilla Extract: Adds warmth and depth to your cake’s flavor profile.
-
Milk: For moisture—your cake will thank you later!
-
Crushed Butterfinger Bars: These are the star of the show! You can find them pre-crushed or do it yourself.
-
Chocolate Frosting: Store-bought or homemade; either way, it’s necessary for that decadent finish.
The full ingredients list, including measurements, is provided in the recipe card directly below.
How to Make butterfinger cake
Preheat Your Oven: Start by preheating your oven to 350°F (175°C). This ensures an even bake when your batter goes in later.
Prepare Your Baking Dish: Grease a 9×13-inch baking dish with nonstick spray or butter. You want your cake to slide right out without any drama.
Mix Dry Ingredients: In a large bowl, whisk together flour, baking powder, sugar, and salt until combined. This step helps aerate the dry ingredients for a fluffy texture.
Cream Butter and Sugar: In another bowl, beat softened butter until creamy using an electric mixer. Gradually add sugar until light and fluffy—about 3 minutes—you want air bubbles for that perfect rise!
Add Eggs and Vanilla: Beat in eggs one at a time followed by vanilla extract. Mix until fully incorporated; your batter should look glossy and inviting.
Combine Wet and Dry Ingredients: Gradually mix in milk alternating with flour mixture until just combined. Avoid overmixing—the batter should be smooth but still thick.
Add Butterfingers: Gently fold in crushed Butterfinger bars into the batter. Their crunchy bits will create delightful surprises throughout your cake!
Bake It Up: Pour the batter into your prepared baking dish and bake for 30-35 minutes until golden brown. A toothpick inserted should come out clean—avoid opening the oven too soon!
Cool and Frost: Once baked, let it cool completely before frosting with delicious chocolate frosting on top. Add extra crushed Butterfingers as garnish if you’re feeling fancy!
Enjoy sharing (and devouring) this incredible butterfinger cake with family and friends while soaking up those compliments!
This delightful dessert captures hearts (and taste buds) everywhere it goes!
You Must Know
- Butterfinger cake is a delightful dessert, combining rich chocolate and crunchy peanut butter flavors
- The texture is moist yet crumbly, making each bite a heavenly experience
- Baking this cake creates an aroma that fills the kitchen, tempting everyone to sneak a taste before it cools
Perfecting the Cooking Process
Start by preheating your oven to 350°F while you mix your batter. Bake until golden brown for perfect results.
Add Your Touch
Consider adding chopped peanuts or drizzling melted chocolate on top. These tweaks enhance both flavor and presentation.
Storing & Reheating
Store leftovers in an airtight container at room temperature for up to three days. Reheat gently in the microwave for a warm treat.
Chef's Helpful Tips
- To master this Butterfinger cake, ensure your ingredients are at room temperature for better mixing
- Don’t overmix the batter; this keeps your cake light and fluffy
- Always check doneness with a toothpick to avoid underbaking or overbaking
Sometimes, my friends still talk about that one time I brought Butterfinger cake to a potluck—it disappeared faster than I could say “seconds!”
FAQ
Can I use different types of chocolate?
Absolutely! Dark or milk chocolate works well; choose based on your preference.
How long will the Butterfinger cake stay fresh?
Stored properly, it can last up to three days without losing its deliciousness.
What can I use instead of peanut butter?
Almond butter or sunbutter makes great alternatives if needed.
Butterfinger Cake
Butterfinger Cake is a delightful dessert that combines rich chocolate and crunchy peanut butter flavors into a moist, layered masterpiece. This easy-to-make cake is perfect for any occasion, from birthdays to family gatherings. The enticing aroma wafts through the kitchen as it bakes, beckoning everyone to indulge in a slice of this nostalgic treat. With its creamy frosting and crunchy Butterfinger topping, this cake promises to be the star of your dessert table.
- Prep Time: 15 minutes
- Cook Time: 35 minutes
- Total Time: 50 minutes
- Yield: Makes approximately 8 servings 1x
- Category: Dessert
- Method: Baking
- Cuisine: American
Ingredients
- 2 cups all-purpose flour
- 1 ½ cups granulated sugar
- 1 tbsp baking powder
- ½ tsp salt
- ½ cup unsalted butter, softened
- 3 large eggs
- 1 tsp vanilla extract
- 1 cup milk
- 1 cup crushed Butterfinger bars
- 1 cup chocolate frosting
Instructions
- Preheat your oven to 350°F (175°C). Grease a 9×13-inch baking dish.
- In a large bowl, whisk together flour, baking powder, sugar, and salt.
- In another bowl, cream the softened butter until fluffy. Gradually add sugar and mix well.
- Beat in eggs one at a time followed by vanilla extract.
- Alternate mixing in milk and dry ingredients until just combined.
- Fold in crushed Butterfinger bars gently into the batter.
- Pour the batter into the prepared dish and bake for 30-35 minutes or until golden brown.
- Allow the cake to cool completely before frosting with chocolate frosting and adding extra crushed Butterfinger for garnish.
Nutrition
- Serving Size: 1 slice (approximately 100g)
- Calories: 440
- Sugar: 38g
- Sodium: 200mg
- Fat: 18g
- Saturated Fat: 10g
- Unsaturated Fat: 7g
- Trans Fat: 0g
- Carbohydrates: 62g
- Fiber: 2g
- Protein: 6g
- Cholesterol: 75mg
Keywords: For added flavor, consider drizzling melted chocolate on top or adding chopped peanuts. Ensure all ingredients are at room temperature for better mixing results.
